New Years E-Card
Online drawing - free download
SEASON FUN
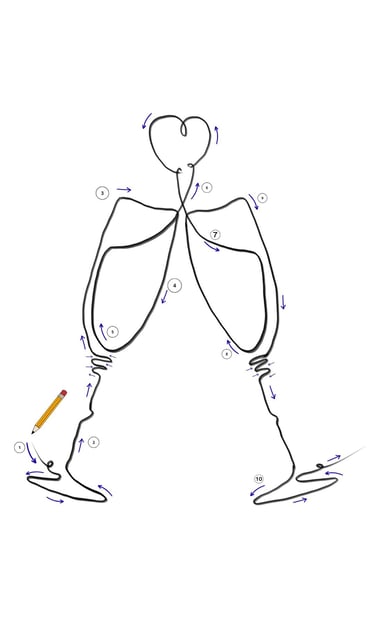
✏️ Draw it yourself
✨ Remember: don’t lift your pen — keep the line relaxed and continuous. The charm of a one-line drawing is in its flow, not perfection.
Part 1 (First Champagne Glass)
Start at the bottom left of the glass and draw a small loop.
Go into the base of the glass.Continue straight upward to form the handle, keeping the line flowing or add a little wiggle.
At the top, move into a short zig-zag line.
With a loose, swinging movement, draw upwards to create the outside curve of the glass.Turn your line 90 degrees to the right, and after a short line turn again and go down.
Draw back down close to the zig-zag lines.
Curve the line upwards to the right corner of the rim. Creating the inside of the glass.
✨ Remember, this isn’t about perfection — it’s about flow and expression. Let your line be playful, enjoy the process, and celebrate every wobbly curve. Each time you draw it, it will feel easier, freer, and more uniquely yours. 💛
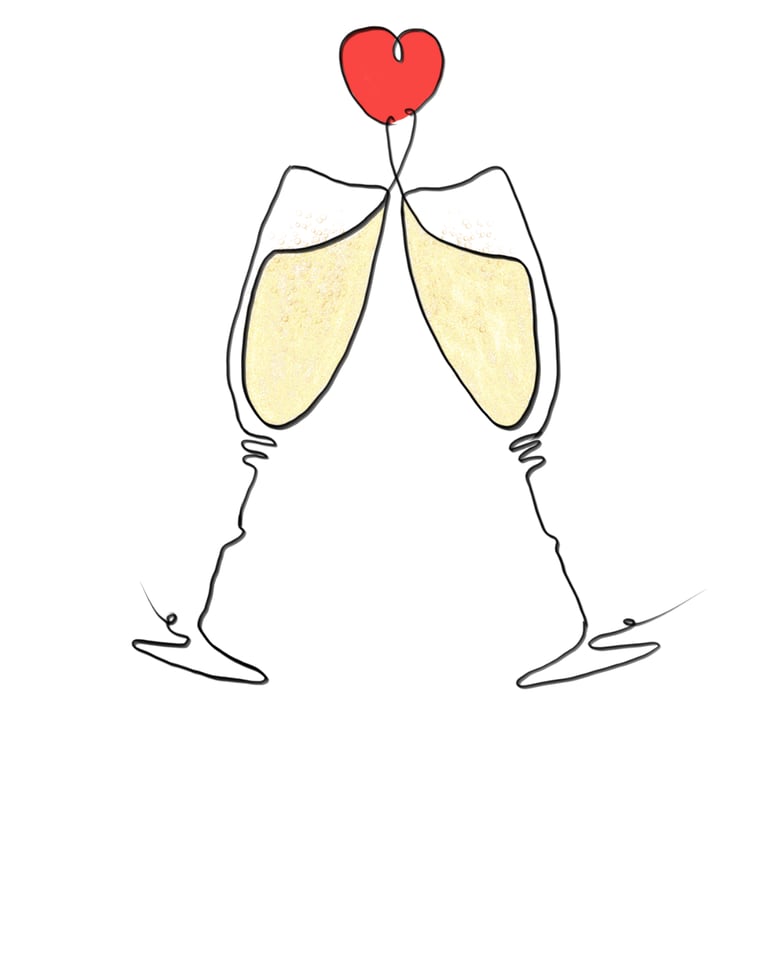
Part 4 (Add Colour)
Now it’s time to bring your drawing to life with a touch of colour.
Add a soft pop of red to the heart to make it stand out.
Gently wash in a light champagne tone inside the glasses — keep it transparent so the line drawing still shines.
✨ Keep it simple and light. A little colour goes a long way, and the magic is in letting the lines stay the hero of the piece.
Part 2 (The Heart)
- From the top of the glass, move the line upward.
- Start the heart with a tiny loop.
- Continue smoothly into the heart shape, letting the line flow.
- In the centre, draw a slightly bigger loop for character and movement.
- Finish the left side of the heart, keeping the curve soft.
- End with another tiny loop to close the drawing gently.
Part 3 (Second Champagne Glass)
From the heart, move the line downward in a soft curve to create the inside of the second glass, just like you did with the first one.
Loop down, then guide the line back up along the left side of the glass.
At the rim, turn the line to the right to draw the top edge of the glass, then turn right again and move downward to form the outside of the glass.
Start the top of the stem with a short zig-zag line, then go straight down, adding a gentle wiggle in the middle.Finish with an oval shape for the base of the glass and end the line with a tiny loop on the right side.

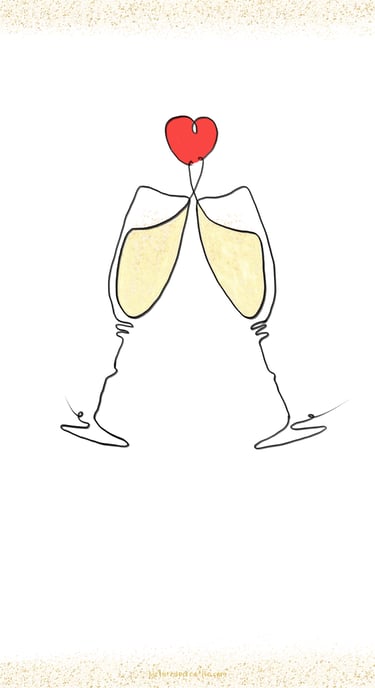
Ring in the New Year with a simple yet meaningful design — a one-line drawing of two champagne glasses clinking, finished with a heart floating above.
Minimal, elegant, and full of feeling, this E-card proves that sometimes less really is more.
give it a go and draw it yourself ✨
or download the finished card if you prefer 💌
want to change the text or add something different around?
You can easily customise it in Canva for free to make it your own. ✨🍾

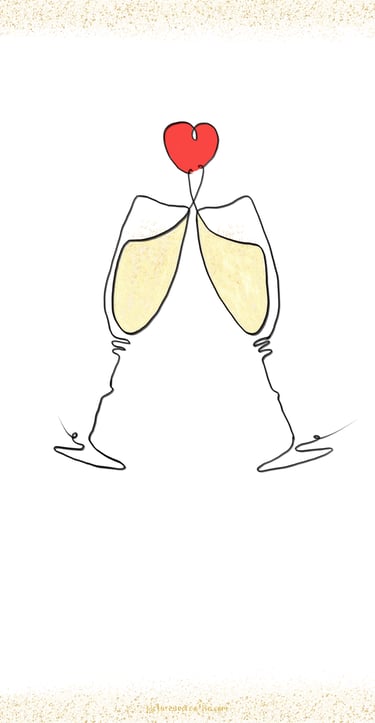
Happy New Year 2026 ✨🥂🎉

💌 Download and send it as an E-Card
Perfect for sharing a little handmade love to welcome the New Year. 🍾💛
Donwnload as JPEG

✏️ Edit in Canva for free
Want to change the text or add something different around?
You can easily customise it in Canva for free to make it your own. ✨🍾
Click the template link to open in Canva.
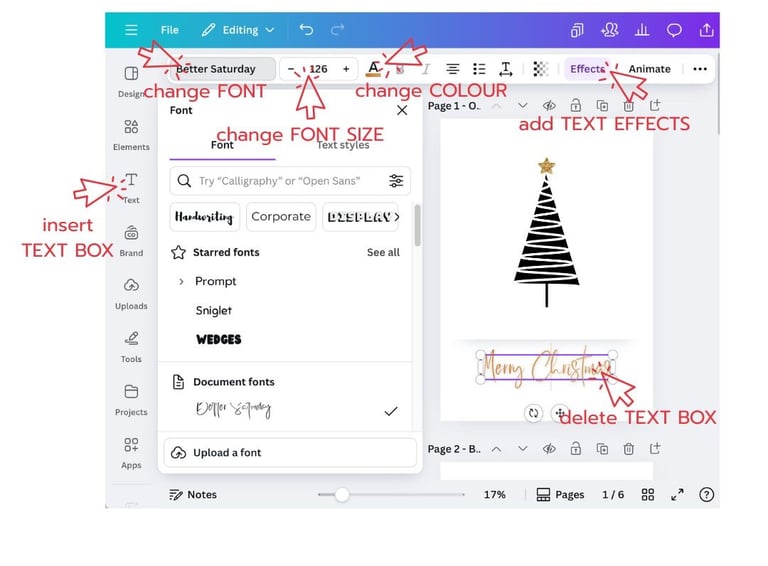
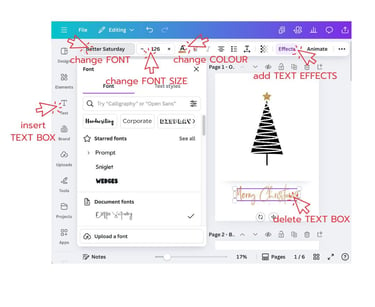
Edit TEXT BOX
1. Click the template link to open in Canva.
2. You will be directed into your web browser.
3. Log in or create a free Canva account.
4. Click View Template > Open in Editor
5. You can use everything from the free version.
6. Text box and Background colour is editable ✏️
7. Delete Text and insert a NEW Text box.
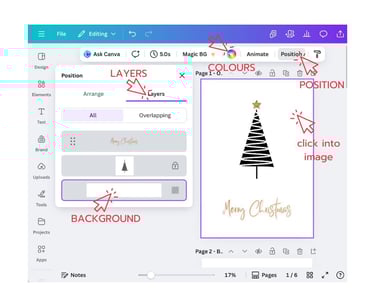
Edit BACKGROUND
Click into the image,
Click ‘Position’ in menu bar and
Choose ‘Layers’
Click BOTTOM layer
Change COLOUR in the menu bar
Do NOT move or change the artwork or layout — these parts are locked.

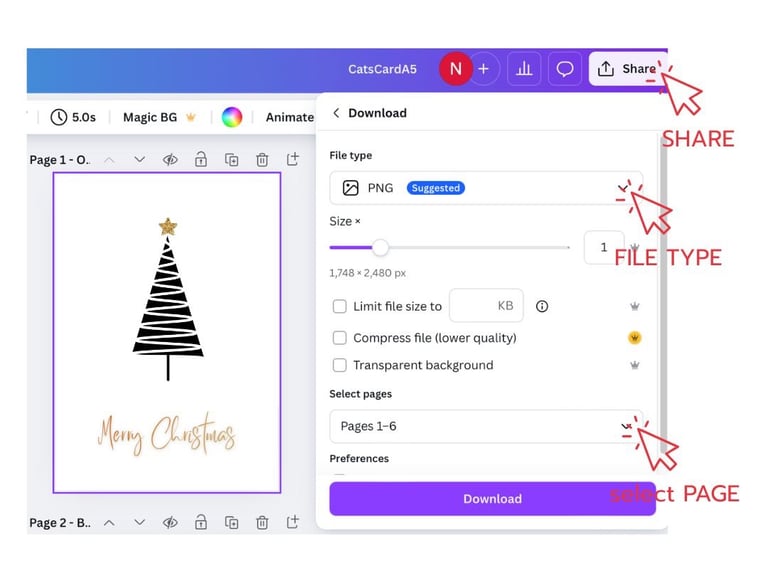
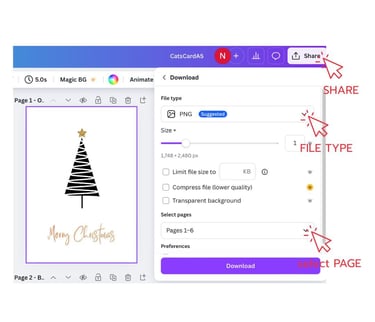
Download & Print
When finished, go to Share → Download and choose PDF Print for printing or JPG/PNG for digital sharing.
Select ‘Page number’
Print at home or send to a pro print shop 🖨️
For e-cards, attach the JPG to messages or post on socials.
Quick troubleshooting tips
Font shows “Pro”? Choose a free font or replace with a similar free font.
Text overflow? Reduce font size or increase text box height/width.
Any problems? Message me, I’m happy to help!
Join me on a journey of creativity!
We won't send you spam. Unsubscribe at any time.
Subscribe for monthly newsletter,
inspiration and tips & tricks for your art journey!
Gift for you, a FREE Watercolour Supply Guide!
🎨 You Might Also Like…